Friday, April 30, 2010

Hot Spinach Artichoke Dip – Less is More for the First Time Ever

If this is the kind of thing you really love to eat at the local sports bar, but never thought about making at home, then I hope you find this video recipe very motivational. Not only is this baked spinach artichoke dip easy and delicious, but it's also a first in culinary history.

For the first time ever, sour cream and mayonnaise have been removed from a dip recipe…and it got better. I've always enjoyed hot spinach artichoke dip, but it always struck me as a little oily. Almost all recipes call for some amount of mayo, which I really see no reason to include. It adds fat with no significant flavor payoff.

I decided to try a mayo-less version, and then raised the stakes even higher by excluding the
sour cream as well. To counter this, a bit more cheese was added, and the results were amazing. A rich, creamy, cheesy, not greasy dip.

While I loved this recipe, I may try it with just a touch of sour cream next time, and that could be named the official final foodwishes formula. I figure I have until football season to work it out.

By the way, I took a quick surf around the web and came up with zero info on the origins of hot spinach artichoke dip. I find this unusual for a dip of such widespread popularity. You would think someone would have claimed credit by now.

Having said that, I only search for about five minutes, so I could have totally missed it! If you actually have any info, even if you have to embellish it to make it more interesting, please share with the rest of us. Enjoy!


Ingredients:
2 tablespoons butter
1/2 cup chopped green onion, white and light green parts only
2 cloves garlic, very finely minced
1 package (10 ounce) frozen chopped spinach, thawed, drained, squeezed dry
1 can (14 ounce) artichoke hearts, drained, roughly chopped
8 ounces cream cheese
1/4 teaspoon hot sauce
very small pinch of nutmeg
salt and fresh ground black pepper to taste
1/2 cup grated gruyere cheese
1/2 cup grated Parmesan cheese, preferably Parmigiano Reggiano
1/4 cup mozzarella, shredded

Thursday, April 29, 2010

Spicy Turkey and 3 Bean Chili

Spicy Turkey and 3 Bean ChiliI currently live in Cincinnati, Ohio - the chili capital of the World. Chili is so popular here that it seems like there are chili restaurants on every street corner.

Brought to the city by Greek immigrants, Cincinnati style chili is usually served over spaghetti noodles with beans, onions, cheddar cheese and oyster crackers at famous local establishments like Skyline Chili, Gold Star Chili, and Camp Washington Chili to name just a few. The sauce is sweet, flavored by cocoa or cinnamon.

This recipe is a more traditional version of this dish that I learned over 20 years ago. Since then, my friend Jennifer has upgraded it with healthier ingredients and added a Southwest flavor with cilantro and jalapeno peppers.

Ingredients:
1 tbsp olive oil
1 lb. ground turkey
1 cup diced onion
3/4 cup diced green pepper
1/2 cup diced celery
2 garlic cloves, minced
3 cups chicken broth
1 15 oz. can diced tomatoes with juices
1 15 oz. can black beans drained and rinsed
1 15 oz. can great northern beans
1 15 oz. can dark red kidney beans
1 4 oz. can chopped mild green chilies
2 tbsp chili powder
2 tspn ground cumin
4 tspn minced, seeded jalapeno chilies
1/2 cup chopped fresh cilantro
salt & pepper to taste

Preparation:
  1. Brown turkey meat and add to large pot
  2. Heat olive oil and saute veggies until softened add to pot.
  3. Add remaining ingredients.
  4. Bring to a boil and then simmer for at least one hour.
  5. Add cilantro prior to serving.
  6. Garnish with cheese, sour cream, and avocados.
Related Posts:
Arrogant Bastard Chili
USA Flag United States Ohio Flag Ohio

My Top Three Asparagus Recipes

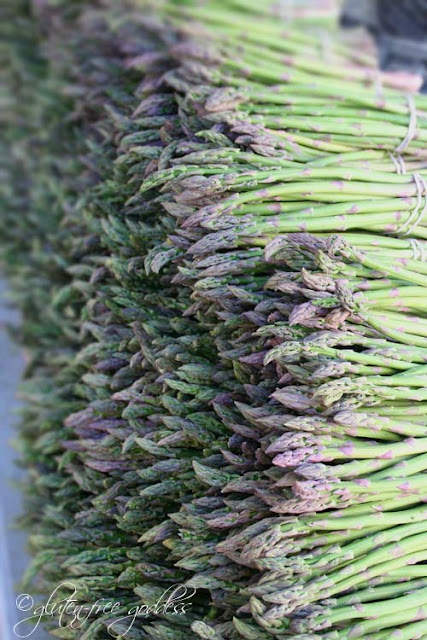
Fresh asparagus at the farmers market
Spring asparagus at Santa Monica Farmers' Market

Asparagus. The queen of spring. Elegant, fresh- and addictive. For many of us, the primavera arrival of asparagus is big news. Huge. Exciting. We simply can't get enough. You see, there is something magical about asparagus. Maybe it's the sexy reputation. Isabelle Allende describes asparagus as phallic in her memoir,  Aphrodite, describing gardens lush with it, and stalks thick as trees. She throws in a few maidens with obvious oral fixations and well. You can guess the rest. 

To be honest, the whole thick as a tree trunk thing, though, is a bit much. Big stalks? Not gonna impress me. I tend to gravitate to the slender young asparagus, myself. The slimmer the better, in my gluten-free part of the world. Why? I barely cook them. It's more like a coaxing. A gentle flash in the pan with some fruity olive oil and a kiss of balsamic vinegar. A pinch of sea salt. Nothing fancy. Keeping them tender-crisp is the key to maximum enjoyment-- for me. But I know some folks prefer long, slow roasting. 

And that's what makes the world go 'round, darling.


Continue reading

Wednesday, April 28, 2010

Neapolitan Pizza Dough

Neapolitan Pizza Dough
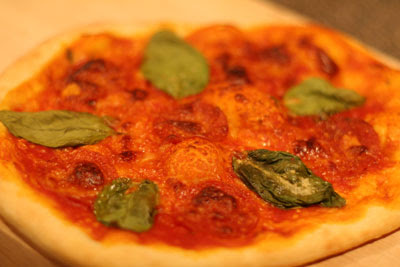
If you decide to master one recipe posted on this blog, this one for Neapolitan pizza dough would be a good choice. If you can make this dough, you can construct hundreds of different combinations of delicious thin crust pizzas. It's so easy and affordable, you'll never order out for pizza again!! Here are the details on how to make Neapolitan pizza dough.

Recommended Equipment:
Mixer (I use the standard Kitchen Aid mixer)
Pizza stone
Pizza stone
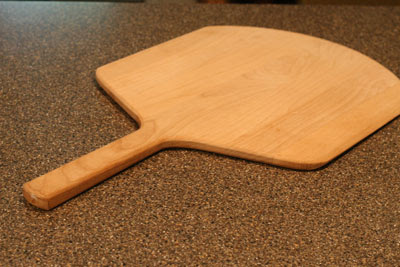
wooden pizza peel
wooden pizza peel
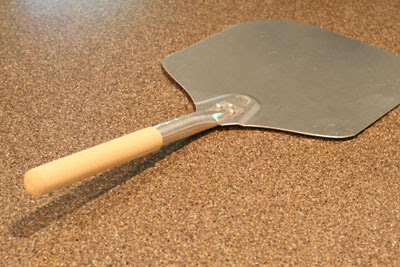
metal pizza peel
metal pizza peel

Ingredients:
4 and 1/2 cups of all-purpose flour
1 and 3/4 tspn salt
2 tspn instant yeast
1/4 cup extra virgin olive oil
1 and 3/4 cup cold water
cornmeal (for dusting pizza stone and wooden peel)

Preparation:
  1. Add the flour, salt, and yeast to a large mixing bowl.
  2. Using a mixer with hook attachment, mix the dry ingredients together and then slowly mix in the olive oil and then the water.
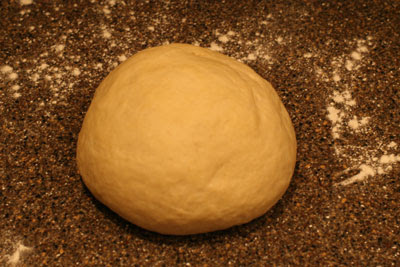
  3. After ingredients have combined and dough pulls from the side of the mixing bowl, turn the dough out onto a counter top that has been dusted with flour.
  4. Work the dough for about 5 minutes.
    Work the dough
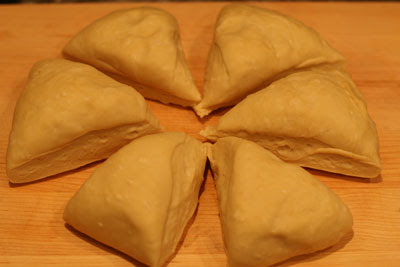
  5. Divide dough into 6 equal parts.
    Divide dough into equal parts
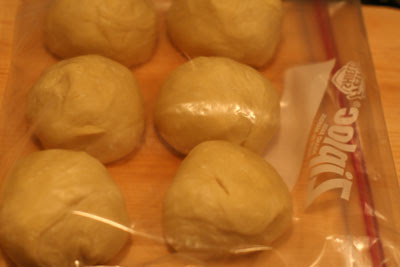
  6. Roll each piece into a round ball and place inside a plastic freezer bag.
    place dough inside a plastic freezer bag
  7. After all of the pieces have been placed inside the bag, seal it and refrigerate it over night.
  8. The next day, place pizza stone on an upper rack in the oven and dust it with cornmeal.
  9. Preheat oven to 450 degrees Fahrenheit.
  10. Dust the wooden pizza peal with cornmeal.
  11. Take one of the balls of dough that you prepared the day before and place it on a counter top that has been dusted with four.
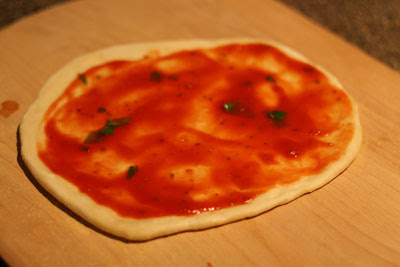
  12. Use your palm to flatten the ball, the pull the edges outward as you turn the circle of dough in your hands. Eventually the circle of dough will become thinner and will expand to about 8 to 10 inches in diameter.
    form a circle of dough
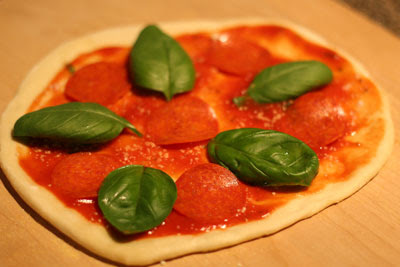
  13. Place the Neapolitan pizza dough onto the wooden peal and top it with whatever topping you like. (The pizza pictured in this post is topped with tomato sauce, fresh basil leaves, oregano, scamorza cheese, Parmesan cheese, and pepperoni). Also, be sure to brush the crust with a thin coating of olive oil.
    top the pizza with cheese
    add other toppings
  14. Slide the pizza onto the pizza stone and bake for 10 minutes.
  15. Using the metal pizza peal, slide the pizza off of the pizza stone.
  16. Slice pizza and serve.
Note: If you don't want to use all of the dough all at once, you can freeze it for up to a month.
Italian FlagItaly

Tuesday, April 27, 2010

The Incredibly Simple Secret to Lump-Free Sauce

Outside of a few choice Black Eyed Peas videos, lumps are rarely associated with something good. When it comes to making sauces and gravies, nothing causes performance anxiety in an inexperienced cook like these malevolent masses. The good news is there's an incredibly simple way to prevent lumps.

Repeat after me, "Hot roux, cold milk, no lumps." That's it. As you'll see in the video, no matter how sloppy your sauce making techniques are, as long as your liquid is cold, and your roux is hot, lumps are almost impossible to create. Below the video, I've given the ingredients for the simple white sauce I used to illustrate my point. I turned mine into a beautiful macaroni and cheese, but this has so many other applications that mastery of its silky-smoothness is mandatory for any wannabe cook. Enjoy!


Ingredients:
3 cups whole milk
4 tablespoons butter
3 tablespoons flour
salt and cayenne pepper to taste
pinch of freshly grated nutmeg
1/2 teaspoon fresh thyme leaves

Monday, April 26, 2010

Building a Better Stuffed Pepper

I reworked the stuffed pepper recipe for the cookbook, and this was the result. I've posted the written recipe below the photo, and I highly encourage you to try it out. Enjoy!


Stuffed Bell Peppers

For the sauce:
1 tablespoon olive oil
1 onion, diced
1 cup beef
broth
2 cups prepared marinara sauce, or other tomato sauce
1 tablespoon balsamic vinegar
1/4 tsp red pepper flakes, optional

For the pepp
ers:
1 pound lean ground beef
1/2 pound sweet Italian pork sausage, casings removed
2 cups cooked rice
1 cup finely grat
ed "real" Parmesan cheese (Parmigiano Reggiano)
1/4 cup chopped Italian parsley
4 cloves garlic, minced very fine
1 can 10-oz diced tomatoes
2 tsp salt
1 tsp freshly ground black pepper
pinch of cayenne
4 large red bell peppers

Add the olive oil to a saucepan, and lightly brown the onions with a large pinch of salt over medium-high heat. Remove half and
reserve for the stuffing. Stir in the rest of the sauce ingredients and bring to a simmer. Pour the sauce into the bottom of a large deep casserole dish.

Add all the filling ingredients to a mixing bowl, along with the reserved onions, and stir with a fork, or your hands, until the mixture is combin
ed. Tip: you can cook a small piece of the filling to test the seasoning.

Preheat oven to 375 degrees F.

Cut the bell peppers in half lengthwise. Use a spoon to remove the stem, seeds and white membrane from each pepper. Place the bell peppers in the casserole dish, and fill each pepper with the stuffing. A little additional cheese can be grated over the t
op if desired.

Cover with foil and bake for 45 minutes. Remove foil and bake uncovered for another 20-30 minutes, or until the peppers are very tender. Exact cooking
time will depend on size, shape and thickness of the peppers. Best to let rest for 10 minutes before serving. Serve with the sauce spooned over the top.

Food and Wine

Just in case you were wondering, here's the menu and what it was paired with this weekend at the Frick Winery. I was preoccupied with food production (that's my story and I'm sticking to it), so I only spent a few minutes taking pictures with predictably mediocre results, but you'll have to take my word for it when i tell you everything looked much better in person. Enjoy!

Jamaican Jerk Chicken Bites with Fresh Mango Salsa and Habanero Jam on Plantain Chips. Paired with the Grenache Blanc and Viognier


Cambazola Cheese on Fig Bread with Fresh Strawberries. Paired with the Cinsaut and Cinsaut Rosé


Grilled 9-Spice Pork "Banh Mi" with Carrots, Daikon, Sweet Chili Mayo, and Asian Barbecue Drizzle. Paired with the Counoise and Grenache


Reuben Nachos: Pastrami, Cave-Aged Gruyere, Savoy Cabbage and Russian Dressing on Corn Rye Chips. Paired with the Carignane and C² (C squared), North Coast Red Rhone Blend


Boccalone's "Nduja" Crostini - Calabrian Spicy Salame Spread with Candied Fennel Root. Paired with the Syrah and Côtes-Du-Dry Creek

Sunday, April 25, 2010

Gluten-Free Chocolate Chip Quinoa Cookies

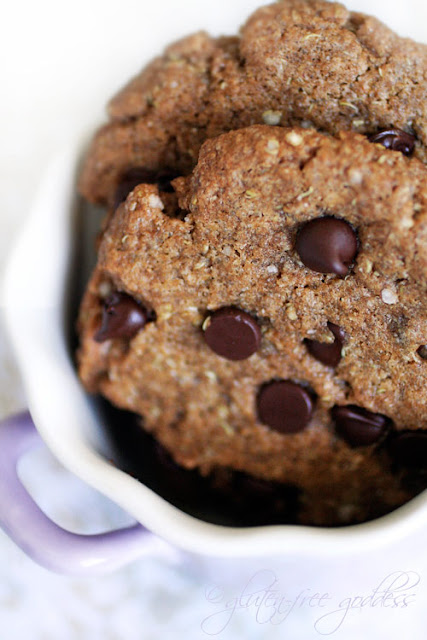
Gluten free chocolate chip cookies made with quinoa flakes instead of oatmeal
Quinoa flakes make a lovely gluten-free oatmeal-style cookie.

My last cookie post stirred up a veritable stew of feelings. From oat-loving high fives and boogie till the cows come home oatmeal cookie bliss, to very sad, That's okay, I'll sit this one out in the corner moping. Because oatmeal? It's not for everyone. Apparently, oats can be unkind to sensitive celiac tummies. So while many celiacs celebrate the availability of certified gluten-free oats (thank you, Bob's Red Mill!), just as many shun this humble cereal grain for the sake of symptoms or safety.

Avena sativa? Not welcome in many a gluten-free kitchen.

Some believe the trouble starts with its globulin or legume-like protein called avenalin. Some think it's the soluble fiber factor. Others believe that the prolemine in oats called avenin triggers a celiac-like response. The debate rages on. And I'm no scientist, I'm sorry to tell you, so I'll sit this one out. But.

The truth is, Babycakes, you don't want to be around moi after I've eaten oats- gluten-free certified or not. Although I tested negative for oat allergy, these tasty chewy little cereal devils produce enough, um, wind in my nether regions to keep Wyoming well lit for a week. 

It ain't pretty, is all I'm saying.

Continue reading

Frick Sunday


Just a very quick update from gloriously sunny Sonoma, where the 2010 Passport event has just concluded. It was another smashing success, and over the last two days we fed a staggering 1,200 people. Michele was amazing as usual, and so were my in-laws Peggy and Al who always come through like champs.

And n
ow my favorite part of the weekend – a quintessentially-Sonoma, post-Passport dinner with winemaker extraordinaire, Bill Frick and his family. We get to relax, trade war stories and a few laughs, and enjoy some of the best food and wine anywhere on earth. We'll be back in the city tomorrow, so stay tuned for a proper recap, and a bunch of exciting new videos!

This wisteria-draped wine barn was where we paired the food and wine, and my only regret is that I couldn't have taken this photo in the proper light.

P.S. I haven't even begun to catch up on emails and comments, so if you are waiting for a reply, thanks for your patience, and check back in if you don't hear from me. Thanks!

Saturday, April 24, 2010

Pastéis Recipe

Pastéis
These half-moon shaped pastries are popular throughout Brazil and were originally brought to Sâo Paulo by Japanese immigrants. Pastéis are great for parties and informal gatherings and can be made with a wide variety of basic ingredients that you have on hand.

Ingredients:
2 cups all purpose flour
2 tbsp canola oil
1 tbsp white vinegar
1 8oz. package of cream cheese
1 cup mozzarella cheese
1 tbsp cachaça (or white rum)
1 cup water
1 tspn salt
1 egg

Preparation:
  1. Mix flour and salt together in a mixing bowl of an electric mixer.
  2. In a separate bowl, mix canola oil, cachaça, and vinegar.
  3. Slowly add the mixture from step #2 to the flour and salt mixture.
  4. Slowly add water little by little as you mix all of the ingredients together.
  5. Work the dough and let rest for at least 2 hours.
  6. Take a small handful of the dough and roll it out with a rolling pin on a lightly floured surface. Roll dough until it is thin.
    Roll dough
  7. Use a bowl or round cookie cutter that is about 4 inches across to cut circles from the sheet of dough.
    cut circles from the sheet of dough
  8. Assemble filling. For this recipe, use about 1 to 2 tablespoons of mozzarella cheese and a small slice of cream cheese per pastéis. You can experiment with a variety of other ingredients as well.
  9. Add the filling of your choice to the center of the circular piece of dough.
    Add the filling
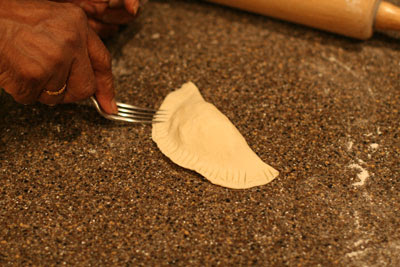
  10. Fold the piece of dough into a half-moon and pinch the edges together using your fingers or a fork.
    Fold the piece of dough into a half-moon
  11. Repeat steps 6 through 10 until all of the dough has been used.
  12. Deep fry the pastéis in a deep fryer, 3 to 4 at a time until golden brown. Optional: baste the pastéis with a light coat of egg yolk before frying them to give them a richer, complex color and added flavor.
Brazilian Flag Brasil

Friday, April 23, 2010

Ropa Vieja Recipe

Ropa Vieja
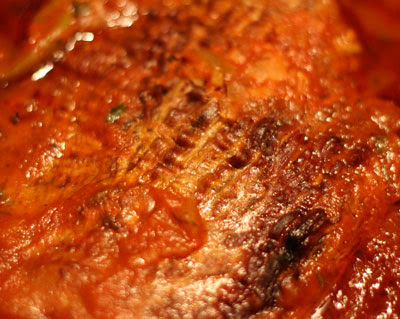
Ropa Vieja literally means "old clothes" in Spanish and refers to the way that the beef shreds after being slow cooked in the mildly acidic sauce for several hours. The flank steak falls apart when you remove it from the slow cooker and the remaining sauce has a complex, slightly spicy, smokey flavor. You can serve this with tortillas or over rice along with diced tomatoes, Oaxaca or cheddar cheese, and sour cream.

Ropas

The first time that we tried Ropa Vieja was at a Cuban Restaurant called Cuba Libre which is located in central London's Islington neighborhood. If you're ever visiting London or if you happen to have a long layover at Heathrow caused by a volcanic eruption in a
distant land, you should visit Cuba Libre. It's a pretty lively place on most nights, with a serious selection of unique drinks and great food.

Recommended Equipment:
slow cooker

Ingredients:
1 tbsp canola oil
2 pounds of beef flank steak
1 cup beef broth
1 8oz. can of tomato sauce
1 6oz. can of tomato paste
1 medium yellow onion, diced
1 green pepper, sliced into strips
4 cloves garlic
1 tspn ground cumin
1 tbsp fresh cilantro, chopped
1 tbsp olive oil
1 tbsp white vinegar

Preparation:
  1. Heat canola oil in a skillet over medium-high heat.
  2. Brown flank steak on each side, about 3 minutes each side.
  3. Transfer beef to a slow cooker.
  4. In a separate bowl, mix the beef broth, tomato sauce, onion, bell pepper, garlic, tomato paste, cumin, cilantro, olive oil, and vinegar.
  5. Add this mixture to the slow cooker.
  6. Cook on low for 10 hours or on high for 4 hours.
  7. Shred the meat and serve with tortillas.
Need a wine to go with the Ropa Vieja? Try this one: Martellotto Paso Robles Cabernet Sauvignon

Cuban Flag Cuba

Thursday, April 22, 2010

Make Gluten-Free Brownie Cupcakes with Namaste Baking Mix

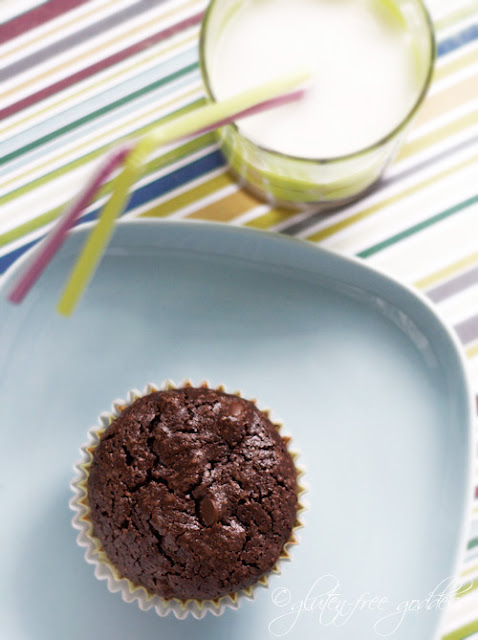
Gluten free brownie cupcakes made with Namaste baking mix
Brownies baked as cupcakes- from Namaste baking mix.

Check out these fudgy little gems. Chocolate chip brownies dressed up like cupcakes. These are Steve's creation. He's been making gluten-free brownies for- let me think a minute- almost nine years. (How, I ask you, is that possible? Nine years gluten-free? Yep. We'll be celebrating nine years of gluten-free living this December. Perilously close to a decade.) So he's the resident brownie expert. I bow to his expertise.

He's baked brownies from scratch. He's tried all the gluten-free mixes. He's added flavors. Coffee. Peppermint. Vanilla. He's added extra chocolate chips. Chopped walnuts. Pecans. Even raisins. He bakes brownies weekly. But lately he's got a new twist to this favorite classic treat. He plops the batter into a cupcake liner clad muffin tin

Steve swears this creates a better, moister brownie.

Continue reading

We're Getting Our Frick On

Michele and I are getting ready to head north for a huge catering event this weekend in Sonoma. If you've been following this blog for awhile, I'm sure you've read about this before. It’s called “Passport to Dry Creek Valley,” which is an annual event showing off the great wines and vineyards of the beautiful Dry Creek Valley.

We'll be doing the food for our frien
d Bill Frick, at the gorgeous Frick Winery for the 14th year in a row! Despite all the planning and prep, it's a ton of fun, and we look forward to it every spring. This photo is the winery's tasting room where all the food magic happens.

This is one of Sonoma's premiere wine/food events, and thou
sands of wine enthusiasts will be eating and sipping their way through the valley. By the way, if you have a chance, check out the Frick Winery website. Bill produces some of the most delicious wine in California.

Due to the limited time, there will probably not be any new videos until after the weekend. This will be the perfect time to review your favorite recipes and make sure you haven't missed any. Don't forget to use the search box in the bar at the top left of the window, to find the recipes you are interested in.

For whatever reason, I've never filmed any how-to's for the appetizer recipes that we've served up there over the years, except for these Calabrese Lollipops. It's an old video, but with backyard party season coming on fast, you may find this quick and easy bite a real nice addition to your repertoire. Enjoy!

Calabrese Lollipops – Antipasto on a stick! (click here for the original post)


In case you want to check it out, here is our Frick recap from last year. Enjoy!

Margarita Recipe

MargaritaThis one comes from my friend Paul in Texas. If you like margaritas, you have to give these a try and if you don't you should still give them a try because they're nothing like the ones that you get when you order a margarita in a restaurant.

When you taste one of these margaritas, you will understand that they were made the old way, by hand, no prefabricated mixes that you find in a 7-11 convenient store. This is the real deal. This is how margaritas were made a hundred years ago. Perhaps Pancho Villa had a pitcher of these when he decided to declare war on the United States. I don't know but I think that when you try them, you will think that perhaps you've finally found Eldorado. I've said it before and I'll say it again, "I don't always drink Margaritas, but when I do they are made this way..." Enjoy responsibly.

Pancho Villa

The following recipe makes 2 to 3 margaritas.

Ingredients:
3 shots of Sauza Conmemorativo tequila
3 shots of Gran Marnier
3 shots of lime juice, fresh squeezed
3 heaping tbsp sugar
crushed ice

Preparation:
  1. In a shaker, add all of the ingredients except the crushed ice.
  2. Stir to dissolve the sugar.
  3. Fill shaker with crushed ice.
  4. Shake until your arm hurts.
  5. If you want salt on the rim of the margarita glass, use a lime wedge to wet the rim.
  6. Pour margarita into glasses and serve.
Related Articles / Posts:
Six Tequilas That Are Too Good For a Margarita

Mexican FlagMexico