I just received an advance copy of the American cookbook I recently authored for Parragon Publishing. I was just too excited to wait for better light, so I shot this with my iPhone tonight for a little tease on YouTube. While this is not the official Food Wishes cookbook, I'm very, very proud of it. Stay tuned for specific details regarding pricing and availability. Thanks!
Tuesday, August 31, 2010
Gluten-Free Peach Cobbler
 |
| This is not Betty Crocker's Gluten-Free Bisquick mix. Nope. |
Is Mercury in retrograde?
And if so, Darling, do I believe it can wreak havoc with recipes? I started out with a different approach to this peach cobbler recipe, you see. I thought I'd try out the new Betty Crocker Gluten-Free
But what I got was a bone white mound of anemic dough (scarily reminiscent of Play Dough
Like an awful lot of the gluten-free foods churned out by corporate
Continue reading
Sunday, August 29, 2010
Peach and Escarole Salad – 'Cause I'm Tired of Greens You Can Gum!
 This magnificent peach and escarole salad was inspired by one Michele and I had on our recent trip to New York City. We were taken out to dinner by my publisher (which has nothing to do with the story, but I really enjoyed typing that) to a place called Hearth, in the East Village.
The salad course was a plate of roughly torn escarole, dressed with a slightly sweet sherry vinaigrette. As I ate, I kept thinking to myself, damn, this is one delicious salad. The odd thing was, it took me a good while to actually put my finger on what exactly made it so wonderful.
Then it hit me. It was made with real, full-grown, somewhat tough, slightly bitter greens. 95% of the salads I eat in restaurants these days are made with the ubiquitous "baby greens" – that bland, one-dimensional, melt-in-your-mouth mixture of lettuce, so soft and delicate you don't even need a set of teeth to eat them.
 This was the polar opposite of that. I had almost forgotten how interesting a salad could be! So, when Michele brought home a couple small heads of escarole one afternoon, I decided to film a salad recipe video, combining the mas macho greens with sweet peaches, goat cheese, and walnuts.
One trick with escarole is to make sure you are using a sweet enough dressing to offset the bitterness. I accomplished that with a dressing of sherry and rice vinegar, and then, just to hedge my bets, I added some perfectly ripe peaches to the mix. The result was one of the best salads I've had in years. Enjoy!
Peach and Escarole Salad Ingredients:
1 small head escarole (smaller is better, as it gets too bitter when large)
1 ripe peach
4 oz goat cheese
1/2 cup toasted walnuts
1 tablespoon rice vinegar
1 tablespoon sherry vinegar
2 tablespoon olive oil
salt and fresh ground black pepper to taste
Marmorgugelhupf - Marble Cake Recipe
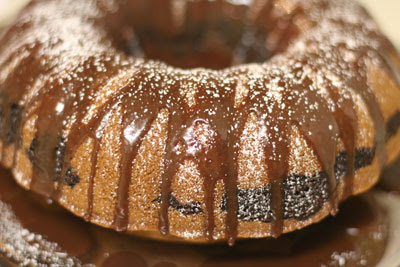 This recipe for Marmorgugelhupf is a modern take on the German classic dessert. It is an excellent complement to coffee and makes a great dessert. Try it with cafe noir.
Recommended Equipment:
tube or bundt pan
stand mixer
Ingredients:
main batter
1 2/3 cup sugar
2 2/3 cup all purpose flour
1/4 tspn salt
2 tspn baking powder
7 eggs
12 oz. unsalted butter, at room temp.
3 tbsp. Kahlua
chocolate batter
2 tbsp whole milk
2 tbsp Kahlua
6 oz. bittersweet chocolate, melted
1/2 tspn baking soda
chocolate glaze
1/2 cup heavy whipping cream
1 tbsp dark corn syrup
2 tspn vanilla extract
1/2 cup milk chocolate chips
Preparation:
- Preheat oven to 325 degrees Fahrenheit.
- Grease a tube or bundt pan.
- In a large bowl or mixer, mix together the flour, baking powder, sugar, ans salt.
- Add butter to the mixture and mix until the ingredients form a paste.
- Mix the eggs and the Kahlua together.
- Slowly mix the egg and Kahlua mixture in with the main batter paste.
- In a separate mixing bowl, construct the chocolate batter by combining the milk, Kahlua, and baking soda. Add the melted chocolate to the mixture and whisk thoroughly.
- Add 2 cups of the main batter to the chocolate mixture and mix until the two have completely combined.
- Pour half of the remaining main batter to the bundt pan and smooth the batter so that it is evenly distributed.
- Pour the chocolate batter evenly over the first layer of main batter.
- Pour the remaining batter evenly over the chocolate layer.
- Using a table knife, insert the blade into the batter. Move the blade up and down in a spiral motion as you make your way around the cake. Stop when you reach the point at which you started.
- Bake the cake until it is firm ~ about 1 hour.
- Remove cake from over and let cool for 5 minutes. Turn cake out onto a cooling rack.
- Make the chocolate glaze by heating the whipping cream to a boil. Add the chocolate chips, vanilla, and corn syrup. Whisk ingredients together. Remove from heat and let the mixture thicken.
- Drizzle chocolate glaze over the cake.
 Germany
Friday, August 27, 2010
Heirloom Potato Salad
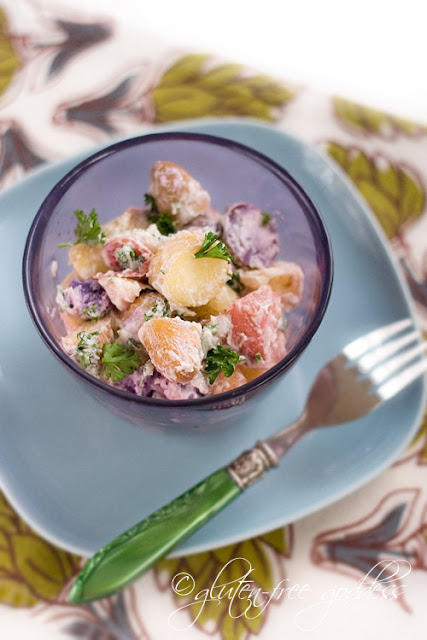 |
| A super easy potato salad with tasty heirloom spuds. Vegan and egg-free. |
I snatched up a bag of those cute little potatoes at the market yesterday. You know the ones I'm talking about. Those baby sized spuds as cute as a button. In Easter egg colors like custard and purple and pink. So sweet and adorable you want to cradle the bag and speak in your talking-to-kittens voice. Heirloom root vegetable deliciousness. Yeah, you shell out a little extra cabbage for these pretty babies, true. But I say, live a little. Indulge in excellent ingredients.
You only got one life.
Continue reading
Hotel Room Cooking Adventures: Cup o' King Salmon
 Hello from Seattle! Running off to get ready for the opening reception of the 2010 International Food Bloggers Conference, but I thought some of you may enjoy this quick and dirty (but very tasty) video recipe I did for cooking salmon with a hotel room coffee kit.
Please, do not try this at home!! Enjoy!
Wednesday, August 25, 2010
Homemade Chicken Stock – Buy Low, Sell High
 With over 400 video recipes produced thus far, it probably seems odd that I'd never done a proper chicken stock recipe. In the early days of the blog, I decided that I wouldn’t do video recipes that would eventually appear in the online culinary academy curriculum.
I had planned on having a selection of videos featuring key techniques that people would pay to watch, but with all the various projects going on, I've never quite been able to get that together. Anyway, this chicken stock video recipe would have been included in that collection.
While I can often be seen using my carton of all-natural chicken broth, there's nothing like homemade. It does take a long time to simmer, but the actual work is minimal, and the procedure quite simple. It's also a very frugal undertaking, with the bones I used costing 80-cents a pound. That's three quarts of chicken stock for about $3 in costs!
Please note that you can use this exact same recipe/procedure with roasted chicken bones. In fact, most of the homemade chicken stocks I make are the result of a roast chicken dinner, but for this video I decided to go classical. Unlike beef and veal, chicken stock is not traditionally made from roasted bones.
You should try both ways, and see which you like, and for what dishes. By the way, even though I didn't roast the chicken bones, I still got quite a nice, richly colored stock, which comes in large part to leaving the skins on the onions. I don't remember exactly why that is, which is fine since I really I don't care that much. Enjoy!
Ingredients:
3 pounds chicken bones, backs and necks
1 large onion, skin on
2 carrots, peeled, cut in large chunks
1 large or 2 small ribs celery cut in large chunks
1 bay leaf
9 black peppercorns
4 springs thyme
2 cloves garlic, peeled
3 quarts cold water
Tuesday, August 24, 2010
We Did It! Foodwishes Wins the Next Food Network Star YouTube Challenge!
 You may have already heard by now, but I was the grand prize winner in the Next Food Network Star YouTube Challenge! Thanks to you, as well as my large, unbelievably passionate, and supportive subscriber base on YouTube, we dominated the competition.
The voting was closed, so there was no way to monitor the number of votes cast, but gauging by the comments on the Food Network's YouTube channel, we crushed it. The response was nothing short of awe-inspiring! It seems one thing is very clear, despite my reservations; most of my fan would love to see me get some kind of show on the Food Network.
By the way, contrary to popular belief, that's not the prize. The grand prize is a trip for two to New York, dinner at one of the Food Network's chefs' restaurants, and an interview with the network executives (although I should warn them – I'm money in an interview). In that meeting I will pitch the idea for a Food Wishes style show, where the food's the star, and the chef is rarely, if ever, seen.
Thanks to all of you who voted! Stay tuned for more information as the adventure has only just begun!
Monday, August 23, 2010
Nectarine Ice Cream with Coconut Milk
 |
| Creamy and subtle coconut milk and nectarine ice cream: vegan yum. |
It's been hot and sultry here in West Hollywood. [One could argue, when is West Hollywood not hot and sultry, Babycakes?] We've been settling into our new apartment, hanging curtains (adios, vertical blinds), unpacking books, and doing laundry. So before I share the new coconut milk ice cream recipe I whipped up last night (after scarfing down vegan tacos like there was no tomorrow, which would be, today) I thought I might also share a few random pics from our new neighborhood.
West Hollywood rocks.
Continue reading
Beans and Greens for Fun and Profit
 "Beans and Greens" is one of those special recipes that truly has it all – it's very easy and inexpensive to make; it's highly nutritious; it's soulful and comforting; and can be served as a main course, side dish, soup, vegetable stew, or my personal favorite…as an appetizer.
It's not my favorite because it's a great appetizer, which it is, but because it's so damn profitable. When I was in culinary school, we were taught the secret to making money wasn't from the main courses, but from selling lots of inexpensive-to-make desserts, salads, and appetizers.
"Beans and Greens" is a popular appetizer in Italian-American restaurants in Western New York, and whenever I travel back east to visit family, I'm always on the lookout for this local delicacy. I'm usually grinning to myself as I eat, fondly thinking back to school and that food costing class, knowing that I'm happily paying $7.95 for something that costs 45 cents to make.
 This is my new favorite home version, and uses delicious, beautiful escarole. This type of curly endive has a pleasantly bitter flavor that mellows as it wilts into the hot, creamy beans. This recipe can be adapted a thousand ways, but no matter how you tweak it, be sure to use a good homemade chicken stock (btw, demo coming soon), or an all-natural, high-quality, low-sodium, ready-to-use broth.
If you try reducing some cheap canned broth by half, you'll have something salty enough to choke a water buffalo. Also, try and find some nice Italian cannellini beans. I like the ones that come in the glass jars, but canned will work also. If not, any white bean should do nicely.
It goes without saying, but do not even think about starting this recipe unless you've made an embarrassingly large pile of the Parma crisps. I hope you give both recipes a try soon. Enjoy!
Ingredients:
2 tablespoon olive oil
4 cloves garlic, sliced thin
1 quart low sodium chicken broth
2 (15-oz) jars or cans white cannellini beans, well drained, not rinsed
pinch of red pepper flakes
1 anchovy fillet
1/2 teaspoon freshly grated lemon zest
2 teaspoons chopped fresh oregano
1 head escarole, or curly endive
salt and fresh ground black pepper to taste
1 tablespoon extra virgin olive oil
Sunday, August 22, 2010
Geoducking
I had no idea I knew so little about the Geoduck! This video, entitled "Don't Judge a Clam by Its Cover: Geoduck," was produced by the incomparable Liza de Guia, from Food Curated. As you know, I'm a huge fan of Liza's storytelling skills, and was particularly fascinated by this episode. For even more geoduck information, please be sure to read her original article here. Enjoy!
Chana dal with white-gourd (Dhudi)
 Ingredients:
200gm White-gourd
1 cup Chana Dal (Bengal gram)
3 cups water for cook the dal
1-tbsp red chilli powder
1\2 tbsp turmeric powder
1 tbsp lemon juice
Salt to taste
For temper:
2-tbsp oil
1\2 tbsp cumin seeds
2 dry red chillies
1 tbsp garlic red chilli paste
Method:
Step 1: Wash the dal in a few changes of water.
Step 2: Soak in water for 15 minutes. Add 3- cup water and cook up to 3 whistles in cooker.
 Step 3: Let it be cool for 5 minutes and after that mix with big spoon.
 Step 4: Peel the white-gourd and cut into small pieces.
  Step 5: Heat the oil in a frying pan add dry red chillies and cumin seeds.
 Step 6: Sauté on medium flame for few seconds, when seeds are in brown color add finely chopped white-gourd with turmeric powder.
 Step 7: Cook on medium flame until it becomes soft.
  Step 8: Then add garlic-red chilli past in low flame. Take care of red color of paste is not change.
 Step 9: Pour the chana daal and stirring.
  Step 10: Cook until the daal was boiled.
  Step 11: Then add red chilli powder, turmeric powder and salt to taste.
 Step 12: Mix well and cook another 5 minutes.
Step 13: Cook dal for 5 minutes more and add lemon juice just before going to turn off the flame.
 Step 14: Turn off the flame and garnish with coriander leaves.
  Step 15: Serve hot with Paratha…
Recipe of Partha is here………….


Worst thing in life is Attachment because it Hurts when you lose it, Best thing in life is loneliness’ it teaches you every thing, when you lose it, you got every thing.
Friday, August 20, 2010
How to Make Parma Crisps (in Anticipation of Future Scrumptiousness)
 I had originally planned to post the beans and greens recipe seen herein with a simple suggestion to serve it with some delicious, Parmesan crostini. They're such a basic garnish that I take for granted you all know how to whip up a quick batch, when in fact some of you may have never attempted something like this before.
So, I decided to do a quick little how-to for making what I call, Parma Crisps. These are a bit different in concept than your average tossed salad crouton. For those we probably spike the bread with tons of garlic, herbs, spices, and pepper, before making it all crispy and sufficiently decadent, to where it will distract us from even the most mundane of salads.
Here we have to remember these are simply to accessorize another dish of food – something rich, comforting, and with big, bold flavors. In that case I want something crispy, crunchy, with a nice nuttiness from the caramelized cheese, but that's about all. Any more than that, in this humble chef's opinion, would be superfluous.
Stay tuned for the beans and greens video recipe coming on Monday. Since you'll want to serve that with these, you may even think about practicing a few times over the weekend, you know, just to be safe. Enjoy!
Ingredients:
sliced baguette
olive oil (no need to use extra virgin)
freshly, finely grated Parmigiano-Reggiano cheese
Thursday, August 19, 2010
Sisig
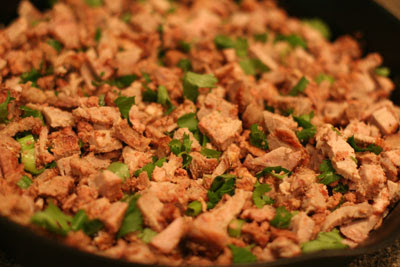 Sisig is a famous Filipino hangover killer. I first heard of SiSig while watching an episode of Anthony Bourdain's No Reservations. It looked really tasty so I searched around for what ingredients are usually included and put together this recipe. I'm not sure if this version of SiSig tastes anything like what you would find in Manila, but it does taste great.
In the Philippines, they use liver and beef tongue to make SiSig. However, these ingredients are not as readily available in your average grocery store here in the United States and the thought of using these ingredients may not seem that appealing anyway. So I put my German heritage to good use and used braunschweiger instead.
SiSig is a great appetizer or side dish and should definitely be served with ice-cold beer.
Ingredients:
1 to 2 pound pork shoulder
1/2 tube of braunschweiger (pork liver sausage) removed from casing
2 cups water
1 cup pineapple juice
kosher salt, to taste
black pepper, to taste
garlic powder, to taste
3 tbsp canola oil
3 green onions, diced
cilantro
marinade ingredients
1 large yellow onion, chopped
7 dried chili peppers
1 Serrano pepper, deseeded and diced
1/4 cup vinegar
1/4 cup apple cider vinegar
juice from 1 lemon
1/4 cup pineapple juice
2 tspn fresh ginger
3 cloves garlic, diced
1 tspn black pepper
1 bay leaf
kosher salt, to taste
Preparation:
- Cut the pork shoulder into large 4 to 5 inch chunks so that most of the meat is trimmed from the bone.
- In a large pot, add the pieces of pork and bone, water, pineapple juice, salt, and pepper.
- Bring to a boil and then simmer for an hour or until meat is tender.
- Drain the pot and let the pieces of pork cool to room temperature. Discard the bone.
- Light the grill.
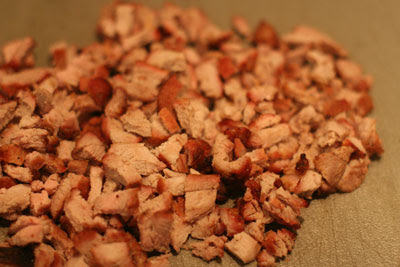
- Cut the pieces of pork into smaller 2 to 3 inch pieces.
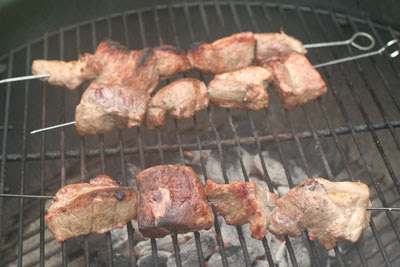
- Put the pieces of pork on metal or wood (soaked in water) skewers.
- Baste the skewers of pork with olive oil and season with a little salt, pepper, and garlic powder.
- When the coals start to turn white, place the skewers on the grill and cook until brown and crispy.
- Remove the pork skewers from the grill and let cool.
- In a large bowl, combine the garlic, ginger, onions, vinegar, apple cider vinegar, lemon juice, chili and Serrano peppers, salt, pepper, and bay leaf.

- Add 1/2 of the pieces of grilled pork to the marinade and refrigerate for 1 hour.
- Cut the other half of the grilled pork into small 1/2 inch pieces.
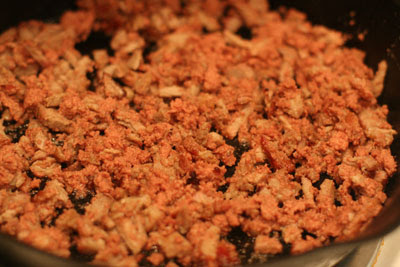
- Add these pieces to a large skillet along with the braunschweiger and 3 tbsp canola oil.
- Heat the skillet over medium for about 10 minutes stirring the ingredients together so that they form a hash type mixture. Remove from heat and set aside.
- After an hour has passed, remove the pieces of grilled pork from the marinade and cut them into small 1/2 inch pieces. Strain the juice from the marinade and set aside for later.
- In a large bowl, combine the hash mixture, the pieces of pork that came from the marinade, and the green onions. Stir all of the ingredients together.
- Serve with a garnish of chopped cilantro and pour some the juice that you reserved from the marinade over the dish for extra flavor. It's OK to use the juice from the marinade as the pork was cooked before it was added to the marinade mixture. Also, don't forget to serve with ice-cold beers (San Miguel if you have it).
 Philippines
Subscribe to:
Posts (Atom)