Monday, January 31, 2011

Getting Ready for the Storm of the Decade

Photo (c) Flickr User kkrisus
I arrived at my mom's this morning after a tiring, but uneventful red-eye flight from San Francisco. Unfortunately, it seems as though a massive blizzard is headed our way, and it looks very likely my drive down to the QVC training will be iced out.

As anyone from these parts will tell you, rain is no problem, snow is no problem, but an ice storm is another thing altogether. Freezing rain collects on trees and power lines, causing catastrophic damage as gravity and Murphy's Law do their thing. Not to mention that when it comes driving surfaces, a sheet of black ice really sucks.

I hear the blizzard will slam 2/3rds of the country over the next 3 days, so if you're in its frigid path, please be careful! In happier news, I'll be attempting to film a Super Bowl-themed clam casino dip recipe tomorrow. Stay warm and stay tuned!

Mulligatawny Recipe

Mulligatawny
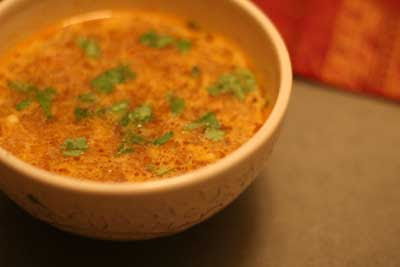
Mulligatawny is a curry flavored soup that has its origins in India during the time of the British occupation. It is similar to rasam but it has a chicken as opposed to a tamarind base. The first time that I had ever heard this soup mentioned was on the famous "Soup Nazi" episode of Seinfeld.

Translated from the Tamil language, mulligatawny means "pepper water." This recipe for mulligatawny includes three types of pepper and is about a 5 out of 10 on the heat/spice scale. In addition to the cilantro and lemon juice garnish, you may also want to add rice to this dish.

Recommended Equipment:
Large pot or Dutch oven
Food processor

Ingredients:
2 tbsp extra virgin olive oil
4 tbsp unsalted butter
1 carrot, finely diced
1 rib celery, diced
1 yellow onion, diced
3 cloves garlic, diced
1/2 eggplant
1/2 cup white wine
1 bay leaf
32 oz. box chicken stock
3 large red skin potatoes, skinned and quartered
1 15 oz. can yellow corn, whole kernels
4 chipotle peppers in adobo sauce
1/2 cup tomato sauce
2 tspn fresh ginger, diced
1/2 tspn ground cumin seeds
1 tspn cayenne pepper
salt and pepper to taste
1/2 tspn thyme
3/4 tbsp sugar
1/2 tbsp curry powder
1/2 cup coconut milk
pinch of turmeric
pinch of cardamom
pinch of ground coriander
pinch of cinnamon
lemon juice
cilantro

Preparation:
  1. In a large pot or Dutch oven, heat the butter and olive oil over medium heat.
  2. Cut the flesh of the eggplant from the skin and cut it into small cubes. Discard the skin.
  3. Add the onions, celery, carrots, garlic, and eggplant to the pot and cook until onions become clear and translucent.
  4. Add the white wine (I used Pinot Grigio) and the bay leaf to the pot and continue cooking at medium heat for another 5 minutes.
  5. Add the 32oz. of chicken stock plus 2 cups of water.
  6. Place the 4 chipotle peppers in a food processor and pulse them 5 to 6 times until the peppers are ground into small pieces and have combined with the adobo sauce.
  7. Add the potatoes, corn, chipotle peppers, and tomato sauce to the pot.
  8. Add the ginger, cumin, cayenne pepper, thyme, sugar, curry, and coconut milk.
  9. Add a pinch each of turmeric, ground cardamom, ground coriander, and cinnamon.
  10. Turn heat down to low and let simmer for 3 to 4 hours.
  11. Serve hot and garnish with lemon juice and chopped cilantro.
Indian Flag India

Sunday, January 30, 2011

Gluten-Free Chocolate Chip Cookie Recipes

Gluten free chocolate chip oatmeal cookies
The best gluten-free chocolate chip cookie recipes on GFG.


It's a cool rainy Sunday here in West Hollywood. I am sipping a hot coconut milk chai to the velvet croon of Chet Baker. And I am thinking about cookies. Not just any cookies. Gluten-free chocolate chip cookies. The best of the best. Sifting through my variations like a saxophone player in the groove of a beat. How do I like them best? That is the question. Because cookies will be baked today. And I've got a handful of chocolate chip cookie recipes to choose from. I've got choices.

Maybe I'll go with a classic style, bumpy with heavenly chunks of a vegan dark chocolate bar. Or the slightly chewy-crisp favorites made with gluten-free rolled oats from Bob's Red Mill. Wait. But then I remember my buckwheat flour chocolate chip cookies. Slightly sweet and verging on cakey. Perfect with a glass of cold vanilla rice milk. And then, to make matters even more complicated, I suddenly crave my quinoa flake cookie dough seductively studded with dark chocolate chips.

Decisions. Decisions.


Continue reading

Mayan Chocolate Cake Recipe

This recipe for Mayan Chocolate Cake is an essential dessert recipe that will serve you well for years to come. Whenever I used to have to make a cake, I would buy a box of cake mix and a can of icing. However, after I started paying attention to the ingredients on those products I wanted to find an easier and healthier way to make them from scratch. I think you will find that this recipe is in fact pretty easy and the cake tastes better than the dry mix varieties that you find at the grocery store.

Mayan Chocolate Cake features cocoa which originated from the gulf coast region in Mexico. The cocoa, along with this chocolate icing recipe featuring Kahlua, give this cake a distinctive flavor only found south of the border.

Recommended Equipment:
stand mixer
2 9 x 2 round cake pans

Ingredients:
2 1/2 cups all purpose flour
1/2 tspn salt
1 tspn baking soda
1/2 cup unsweetened cocoa powder
2 cups sugar
1 cup unsalted butter, warmed to room temperature
4 eggs
1 cup sour cream
1/2 cup whole milk
2 tspn pure vanilla extract

Preparation:
  1. Preheat oven to 350 degrees Fahrenheit.
  2. In a large bowl, mix flour, cocoa, salt, and baking soda and set aside.
  3. In a large mixing bowl (I used a standard Kitchen Aid stand mixer), beat the butter and sugar together for 5 minutes.
  4. Mix in the eggs one at a time.
  5. Next, mix in the sour cream, milk, vanilla extract.
  6. Gradually mix in the flour mixture until it is completely blended. Do not over mix.
  7. Scrape the sides and bottom of the bowl to ensure that all of the dry flour mix has combined.
  8. Grease 2 round pans with butter then dust them with flour.
  9. Pour 1/2 of the cake batter into each pan.
    chocolate cakes - prebake
  10. Place pans in the oven and bake for 30 to 35 minutes. Remove them from the oven when you can insert a form into the top of the cake and it comes out dry.
  11. Let the cakes cool for 30 to 45 minutes.
    chocolate cakes cooling
  12. Cover the cakes with aluminum foil and place in freezer for 3 to 4 hours.
  13. Move the cakes to the refrigerator to thaw for at least 4 hours then remove from refrigerator.
  14. Place cake on a plate and apply frosting to the top of the cake.
  15. Place the second cake on top of the first. The frost the top and sides of the cake.
Mexic0

Saturday, January 29, 2011

Heading Home to See Mom, and Eventually Cook with David

Photo (c) west-chester.com
I'll be grabbing a red-eye Sunday night for snowy Western New York, to spend a couple weeks visiting with my mother, Pauline, and the rest of the family. But wait, that's not all! While I'm home, I'll be driving down to West Chester, PA, to the QVC Studios to train for a future appearance to help promote the cookbook I did for Parragon Publishing (read about that here, if you're not already in the know).

Before they let you on the largest home shopping network going, you have to do a day of training to learn all the finer points of shilling, telling people that operators are standing by, and how they can afford the book by breaking up the payments into smaller, more manageable installments.

If everything goes well, I'll be appearing on the wildly popular, In The Kitchen with David. I've never seen the show, but I found this video on fellow celebrity blogger, Hungry Girl's YouTube channel. Have a great weekend, stay tuned, and enjoy!


Friday, January 28, 2011

Honey-Brined, Southern-Fried Chicken Breasts – Boneless, Skinless, Low-Fat, and Delicious?

Is there anything less inspiring than a boneless-skinless chicken breast? There must be, but for the sake of this post, let's say there's not. So, how do we turn this culinary snoozer into something worthwhile? Fry it. Hey, that was easy.

Of course, the problem here is there's no flavorful skin on which to attach a crunchy coating. To add insult to injury, the fatty skin also protects the bland breast from drying out. Despite these obvious issues I decided to attempt Southern-fried boneless-skinless chicken breasts anyway.

As fate would have it, the same day I bought the chicken, Alton Br
own was doing a honey-brined pork shoulder on Good Eats. To combat the dreaded dry chicken I decided to use a simplified variation to soak my breasts.

I won't bore you with all the scientific details, but through osmosis, brining raises the internal temperature at which the moisture is forced out of a protein. Even though I only brined my breasts for an hour, it worked like a charm. As you'll see in the recipe video, the meat was very juicy.

As far as the skinless-coating went, I was also pleasantly surprised. Even though it was incredibly thin, it stayed on the meat throughout the frying, and the final result was nothing short of quite good.

And yes, I am calling this low-fat (relative to regular Southern-fried chicken). When you eliminate the skin, you significantly reduce the calorie count, and even though we're cooking this is lots of oil, the coating is too thin to absorb very much of it.

If frying isn't your thing, still I encourage you to give this ultra-simple brine a try anyway. I think you will be impressed with its effect. I plan on using this on a regular basis this summer while rocking the grill. Enjoy!


Ingredients:
2 boneless-skinless chicken breasts
3 cups cold water
1/4 cup kosher salt
1/4 cup honey
1/4 cup buttermilk
1 cup flour
1/2 teaspoon salt
1/2 teaspoon garlic salt
1/2 teaspoon onion salt
1 teaspoon black pepper
lots of cayenne
vegetable oil for frying

Thursday, January 27, 2011

Arrogant Bastard Chili

Arrogant Bastard ChiliThis recipe won my wife's office chili cook-off a couple of years ago. It was a unanimous favorite and in a chili town like Cincinnati, that says something. The recipe calls for Arrogant Bastard Ale but if you can't get your hands on a case of this, Michelob Amber Bock works really well too.

Ingredients:
2 pounds of ground beef
1 yellow onion, diced
3 - 5 garlic cloves, diced
1 28oz. can of Joan of Arc spicy chili beans
1 14oz. can kidney beans
1 28oz. can diced tomatoes
1 14oz. can RoTel tomatoes with green chilies
1 46oz. can tomato juice (use 2/3 of can)
1 tbsp chili powder
1/2 tbsp paprika
1/2 tbsp cayenne pepper
salt and pepper to taste

Preparation:
  1. In a large pot or Dutch Oven, brown the ground beef.
  2. Add the diced onion, salt, and pepper. Cook until onions are translucent in color.
  3. Add the remaining ingredients and simmer for 4 to 5 hours.
Recipe courtesy of Rachel Kirkwood

Related Recipe:
Spicy 3 Bean Chili
USA Flag United States Ohio

Gluten-Free Cinnamon Raisin Scones

Gluten free cinnamon raisin scones are lovely with tea
A warm gluten-free scone. Hot tea. Breakfast bliss.

Are you sick of the snow yet? My heart goes out to you. So many of you have been hammered this winter. Spring will arrive this year not a moment too soon. My advice? Bake some scones. Scones are easy to throw together. The oven warms up the kitchen and chases off the chill. And in less than half an hour you have a tender gluten-free morsel to share and savor. Gently spiced with cinnamon and nutmeg, and studded with sweet bursts of raisins, I predict these cinnamon raisin scones will make you smile.

And speaking of predictions, Punxsutawney Phil better man up and predict an early respite come February 2. My fingers are crossed for all of you shoveling out from under. Not that I'm superstitious, or subscribe to the precognitive powers of double furred rodents, but. I remember the long dreary bouts of cold and gray all too well. I spent almost fifty-five years in the grip of Old Man Winter, praying the illustrious marmot would not see his shadow.

Will we have an early spring?

I hope so, Darlings. I hope so.


Continue reading

Next Up: Low-Fat, Honey-Brined, Southern-Fried Chicken Breasts (Yes, I get paid by the hyphen)

Wednesday, January 26, 2011

Cream Cheese Arepas and the Machine

When I first discovered arepas on a trip to New York City last year, it was love at first bite. I couldn't wait to get back to San Francisco, find some P.A.N. arepas flour, and make a batch or two, which I did in this post.

Since it was my first attempt, I used the classic water, salt, white cornmeal mix to delicious effect. As I read more about arepas, I saw there were hundreds of variations, using all sorts of combinations of milk, cheese, cream, buttermilk, yogurt, etc. I decided I wanted to try a breakfast version made with cream cheese and milk, topped with butter and honey. Unfortunately, I never did.

So, when my friends at Imusa asked me to test their arepas maker, I knew exactly which recipe I'd try. As you'll see, this machine was very easy to use, and produced some fine arepas (even though my dough was a tad dry and cracked a little – and to paraphrase the great Whitney Houston, when it comes to arepas perfection, cracks are wack).

If you don't use a specially made grill for these, worry not; they would come out fine using a pan as I did in the original video. If you want more info about this particular model arepas maker, please check out this Imusa product link. Also, if you can't find the P.A.N. arepas flour in a store near you, follow this link to purchase online.

On a side note; I have to admit, as I was using the machine, I kept daydreaming about doing burgers and eggs with it as well. So, don't be surprised if you see this machine appear in future videos with alternative recipes. Enjoy!

UPDATE! As viewer AFB just brilliantly pointed out, you can certainly just place your dough balls in the maker and let it press them down into patties for you. This is, of course, the main advantages of using this machine! I like the smoother edges hand-shaping provides, and I did make sure they were thicker than the press is deep, so that both sides are in contact. I may do an updated test to see how this faster and more traditional use of the press works.


Cream Cheese Arepas Ingredients (makes 4):
1/2 teaspoon salt
3/4 cup milk
1/4 cup softened cream cheese
1 tsp sugar
1 cup P.A.N. arepas flour

Note: This video was made possible by Imusa, and the arepas maker was provided free of charge to test.

Tuesday, January 25, 2011

You Asked for It!

Remember when I posted the "Potato Ball in Potato Box" video, and you guys started joking around about deep frying it? Well, here you go! This was a YouTube video response from kashioable.

Monday, January 24, 2011

Stovetop "Sous Vide" Episode 2: NY Strip Steaks – Pretty and Pink

The duck breast we did in Episode 1 of our stovetop sous vide series last month was so spectacular, I couldn't wait to give it a try with some nice thick steaks. I had no doubt that it would work (thanks to the laws of physics), but would the extra time and attention be worth the payoff?

Well, that depends. As far as the taste and texture of the meat goes, it was pretty much the same as any perfectly cooked steak I've ever had. Not to sound all braggy, but thanks to having done thousands of them, I can produce a pretty decent, medium-rare NY Strip steak in
about 15 minutes.

It will be nicely browned and crusty outside, warm and pink in the middle. So for me personally, I'm not sure the extra wait is worth it purely for the textural advantages is provides. Don't get me wrong, the results were fabulous, but do I really need to wait 2 1/2 hours to get my beef on?

The real advantage to this technique is not a superior-quality final product (like it was for the duck), but the fact that you're guaranteeing a perfect medium-rare (using 130 degrees F. water, or 140 for medium, or 150 for medium-well, etc.). So, if you've never had any luck getting large, expensive hunks of steak cooked to your idea of perfection, then this is the way to go, for sure.

Since we went over the basics of this procedure in the previous post, I won't rewrite all the background info about what sous vide is, and how it works. For that kind of scintillating background information, please check out, "Episode 1: The Best Duck Breast Ever." Enjoy!

NOTE: For LOTS more information about doing sous vide steaks, check out Sous-Vide 101: Prime Steak Primer by J. Kenji Lopez-Alt, posted on Serious Eats.


Ingredients for Stovetop "Sous Vide" NY Strip Steaks:
2 (12-14 oz) NY Strip Steaks
1 teaspoon grape seed oil , or vegetable oil
2 tablespoons butter, divided
handful of trimmed mushrooms
salt and freshly ground black pepper to taste
1 clove garlic
1/2 teaspoon balsamic vinegar

Surti Undhiyu

This is for my dear all friends who requested me lots of time for recipe of Undhiya in winter and from last two years I am very lazy to post it because it is quit long process to make it with all photographs but finally I decided one day I will made this in winter for my all blog friends. For all this photographs it tFont size takes one and half hours for made this. And when I edit this entire photograph and write a recipe for this this takes another one and half hours. After that when I post this entire photograph it takes another one an d half hour for posting this one recipe but finally I am happy that I was done it with my all feeling to all my blog friends.

In this month Shriya comment me like this...

Kajal, Will you be making Undhiyu this winter and do a post on it? Shriya
I was done for you dear and another lots of my friend who give me inspiration for this recipe....

Preparation Time: 30 minutes
Cooking Time: 30 minutes

Serve about 8 people

Ingredients for Muthiya (or gatta):

2 cup wash and chopped fenugreek (methi) leaves
1 cup whole wheat flour (gehun ka atta)

¼ cup besan (Bengal gram flour)

3 tbsp sugar powder

1 tbsp coriander powder

2 tbsp red chilli powder

½ tbsp turmeric powder

1 big size lemon

¼ tbsp fruit salt

Salt to test

Oil for deep fry

Method of making Muthiya:
Step 1: Mix all the dry ingredients for muthiya.

Step 2: Add little oil and ¼ tbsp fruit salt for making Muthiya soft. Add lemon juice and mix together.


Step 3: Add wash and chopped green methi in it.


Step 4: Make stiff dough.


Step 5: Form into small oval dumplings.


Step 6: Heat the oil for fry Muthiya.

Step 7: Sauté the muthiya in heat oil for about 2 minutes.

Step 8: Remove from oil and keep aside.


Ingredients for green masala:

50 gm wash and chopped green coriander leaves

12-15 garlic (use green garlic if available)


6-7 green chillies


Big size ginger piece


100 gm roasted skinless peanuts

3 tbsp sesame seeds


2 tbsp sugar powder


1 big size lemonSalt to taste

Making green masala:

Step 1: Cut green chillies , garlic and ginger and crush into mixer not a smooth paste.

Step 2: Half crush the roasted skinless peanuts into the mixer.

Step 3: Mix the coriander leaves with green chilli past, sesame seeds, crush peanuts, salt, sugar and lemon juice.

Step 4: here you don’t required oil or water anything for these green masala.
Ingredients for Undhiya:

250 gms surti Papdi

100 gms yum chunks peeled (suran)

100 gms purple yum chunked peeled (Ratalu)

100 gms sweet potato chunks

100 gms small brinjal (began or eggplant)

50 gms small potatoes

½ gup green peas

1\2 gup green tuver (green lentil)

1 tbsp turmeric powder (Haldi)

½ tbsp asafetida (hing)

6-7 big spoon oil
Salt to taste

Making undhiyu:
Step 1: Clean small surti green papdi and cut into long pieces.

Step 2: Cut purple yum, yum and sweet potatoes into big pieces.

Step 3: Take half of green masala and rube the chunky veggies (yum, sweet potato & purple yum).
Step 4: Marinate for 15 minutes.

Step 5: Take a small peeled potatoes and brinjal and slit into 4 parts as bottom alone.

Step 6: Stuffed green masala inside the brinjal (began).

Step 7: Stuff all potatoes with remaining masala.

Step 8: In a pressure cooker heat the reaming oil form deep fry muthiyabecause it contains aroma of methi leaves so use that oil and add asafetida.


Step 9: Next add the surti papdi in heat oil.

Step 10: Add green lentil ( fresh tuvar ke dane) and mix well.

Step 11: Then next add fresh green peas.

Step 12: Add all the chunky vegetables with green masala. Add 1/4 cup water but don’t stir here.
Step 13: Add Potatoes and brinjal (began) with soft hand.

Step 14: Last add the Fry muthiya in it.

Step 15: Sprinkle ½ cup water over all vegetables.

Step 16: add salt and lemon juice as par test as we add slat in masala and muthiya laso so add little amount of salt here.

Step 17: Cover with cooker lead and cook in low flame for two whistles.

Step 18: Open the cooker after 4-5 minutes.

Step 19: Undhiyu is ready to serve hot as is it.

Step 20: Sprinkle some begangarm sev on the top, if you wish and serve hot with chapattis or paratha.


I made this Undhiya for My PAPA birthday on 14th January for our Uttrayan festival in Gujarat...i made another lot's of things with it....is as below...


Enjoy with lots of LOVE...:-)